Tuesday, December 27, 2022

Accurate AI Promtps #1 (NSFW)

large nipples on bare exposed breasts, hanging down breasts, brown nipples, woman of color, shopping for an all in one fax copier printer at best buy


#AInal #stabledifussion #AI #womenofcolor #goodjob

Friday, October 14, 2022

I'm Impatient - Fedora 37

 I'm impatient and do not want to wait 4 days for Fedora 37 to launch. Below are the commands to use if you're impatient too. This is for upgrading from Fedora 36.

Start with this command to make sure everything is up to date before you attempt your hasty upgrade.

sudo dnf upgrade --refresh

 Next install the dnf upgrade plugin.

sudo dnf install dnf-plugin-system-upgrade

This next one takes a bit depending on your 'net speed.

sudo dnf system-upgrade download --releasever=37

Finally the money shot! 

sudo dnf system-upgrade reboot

If you didn't fuck up you should be running Fedora 37 when finished. 

Friday, July 1, 2022

Ship of Harkinian - Linux Build

Last night I followed the instructions and compiled up a fresh batch of Ship of Harkinian. You can download it from the below link.

The binary compiles in a docker container so it used its own libraries versions. In order to get it to run under Fedora 36 I had to make a symbolic link from my installed libbz2. The command I used it below.

sudo ln -sT libbz2.so.1.0.8 /usr/lib/libbz2.so.1.0

 Here are some screen shots. Download link is below.


Friday, June 10, 2022

Stadia Hardware VP9 under Fedora Linux

RIP Stadia. I'll miss you.


After long nights of beating my head against a wall I finally figured out the special recipie for hardware decoding the VP9 codec in Google Stadia. Contrary to what I've read in a whole slew of forum posts from the past 2 years, hardware decoding is possible in Linux with the standard Google Chrome browser. I didn't need to use any special builds of Chromium or Microsoft's Edge browser. I am using the very same RPM you can download off Google's website.

Goggle Stadia

I am running Fedora 36 Workstation Linux. I'm not sure how much of this article will apply to other distributions but at least the general idea should hold up. I'm running with an AMD 6900XT RDNA2 card in my system, I've not installed any extra driver or libva packages beyond what's installed during the OS install. So everything should be pretty standard for other AMD or Intel cards. nVidia cards will need their proprietary drivers installed. Normally I use the nVidia packages from RPM Fusion but you can install them however you please. I also run a X.ORG session as I couldn't get hardware decoding to work in Wayland.

First off you'll want to make sure your card supports libva decoding. I'd think pretty much any modern video card will, but to check use the terminal command vainfo. Below is the output for my system.

[jeremy@fedora ~]$ vainfo
libva info: VA-API version 1.14.0
libva info: Trying to open /usr/lib64/dri/radeonsi_drv_video.so
libva info: Found init function __vaDriverInit_1_14
libva info: va_openDriver() returns 0
vainfo: VA-API version: 1.14 (libva 2.14.0)
vainfo: Driver version: Mesa Gallium driver 22.0.3 for AMD Radeon RX 6900 XT (sienna_cichlid, LLVM 14.0.0, DRM 3.44, 5.17.12-300.fc36.x86_64)
vainfo: Supported profile and entrypoints
      VAProfileMPEG2Simple            : VAEntrypointVLD
      VAProfileMPEG2Main              : VAEntrypointVLD
      VAProfileVC1Simple              : VAEntrypointVLD
      VAProfileVC1Main                : VAEntrypointVLD
      VAProfileVC1Advanced            : VAEntrypointVLD
      VAProfileH264ConstrainedBaseline: VAEntrypointVLD
      VAProfileH264ConstrainedBaseline: VAEntrypointEncSlice
      VAProfileH264Main               : VAEntrypointVLD
      VAProfileH264Main               : VAEntrypointEncSlice
      VAProfileH264High               : VAEntrypointVLD
      VAProfileH264High               : VAEntrypointEncSlice
      VAProfileHEVCMain               : VAEntrypointVLD
      VAProfileHEVCMain               : VAEntrypointEncSlice
      VAProfileHEVCMain10             : VAEntrypointVLD
      VAProfileHEVCMain10             : VAEntrypointEncSlice
      VAProfileJPEGBaseline           : VAEntrypointVLD
      VAProfileVP9Profile0            : VAEntrypointVLD
      VAProfileVP9Profile2            : VAEntrypointVLD
      VAProfileAV1Profile0            : VAEntrypointVLD
      VAProfileNone                   : VAEntrypointVideoProc

It looks like my card is supported so I'm gonna move on to convinecing Chrome to use this hardware decode acceleration. Several forum posts from the past couple of years claim I need to set flags under chrome://flags to enable hardware VP9 decoding but this is untrue. I've done everything via the command line. I didn't want to make anything set in stone so the command line is fine with me. 

Here is the terminal command I used to start Chrome with.

google-chrome --ignore-gpu-blocklist --enable-gpu-rasterization --enable-zero-copy --enable-features=VaapiVideoDecoder --disable-features=UseChromeOSDirectVideoDecoder --use-gl=egl

After starting Chrome with the above options you can navigate to chrome://gpu and check out what your card is capable of. Mine looks like the below.


The biggie here is Video Decode: Hardware accelerated. If you see it's enable then Stadia should be good to go.

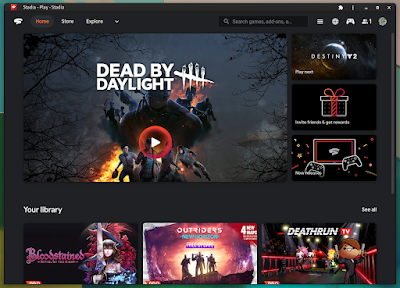
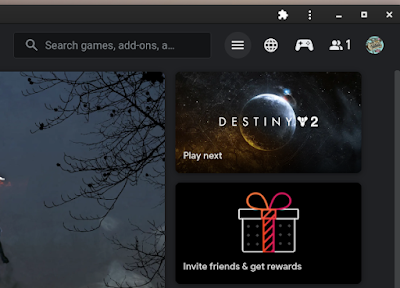
Before you run off to stadia.com I recommend installing one google extension to help enable the VP9 codec and set your monitor's resolution. I'm talking about Stadia Enhanced. You can find it by clicking here or searching for it on the Chrome Web Store. Once you have it added to Chrome we can go to stadia.com.

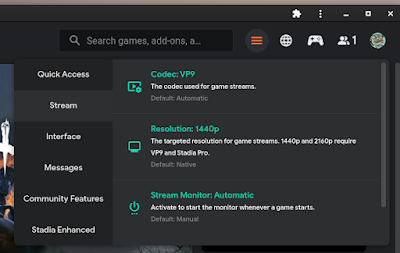
If you're familiar with the Stadia website you'll notice a couple of changes caused by Stadia Enhanced. Namely the cheeseburger menu button next to the search box. We'll be using this menu to set up the few changes we need to make to Stadia. Just follow along and you'll be set in no time.


See the cheeseburger menu button? It's right by the search box. Click it!


After you click the cheeseburger a memu will drop down. You'll want to click on the Stream tab to the side. Here you will set the Codec to VP9, set the resolution to whatever your monitor will do (keep in mind anything over 1080p requires Stadia Pro) and enable the Stream Monitor for now to verify Chrome is decoding in hardware.

Normally after setting option in Stadia I refresh the page to make sure they took properly. After Stadia refreshes pick a game and start it. If everything goes as it should you will have confirmation in the Stream Monitor nestled in the upper left hand corner. It should look something like this.


Now you have verified everything is working. You can back out of your game and disable the Stream Monitor if you like. From here you can make a desktop item for stadia with the needed options or you can start it from a terminal each time. The choice is yours about how to use this newly learned information.

Sunday, February 20, 2022

Applications I use on my M1 Mac

I'm normally a Linux guy (Fedora Linux mostly). I have several favorite programs I use when running Linux. Some of them compile and run fine on my M1 Mac mini. Some are a complete train wreck. Below is a list of Mac specific applications I use and what they are used for. I'll update this list as I discover new applications which tickle my fancy.

Bitmap graphics and photo editing


Pixelmator Pro - I tried to run GIMP on my Mac and it was a pretty terrible experience. After admitting defeat I started looking for an alternative to GIMP that wasn't Photoshop. I tried several applications and most were either too basic or weren't what I was looking for. Pixelmator Pro was the best of the worst. It has a few features I didn't know I wanted in addition to the usual boring image editing stuffs. Pixelmator Pro also natively supports the M1. I use this as a replacement for the GIMP.

Vector graphics, editing and drawing


Affinity Designer - Another of my favorite art type programs I use under Linux is Inkscape. On my Mac mini Inkscape runs for crap. The performance is really bad, mostly due to macOS using Rosetta 2 to run this x86-64 program. Affinity Designer has most of the normal features you'd expect from a vector drawing program. The interface is mostly sane. The only missing feature from Affinity is a bitmap trace function. I use this along with Vector Magic as a replacement for Inkscape.


Vector Magic - To make up for the lack of bitmap tracing in Affinity Designer I needed to find a a suitable replacement. Vector Magic does tracing and does it really well. It has an ugly interface and hideous layout but it works great. I use this in conjunction with Affinity Designer as a replacement for Inkscape.

Thee Internets


Downie 4 - This is one of my favorite apps on this little Mac Mini. It takes video links and downloads them. I'm not certain about every site it supports but Downie has downloaded everything I've thrown at it. The options pane says it supports about 874 sites in total.


Transmission BitTorrent - I don't know what I can say about Transmission that hasn't been said before. It just works. I use it while under Linux and on my Mac.


Cyberduck - A very nice FTP client which supports tons of connection methods. Cyberduck has a really clean interface and is as much of a joy as a FTP client can be. I use this as a replacement for Filezilla.

Utilities & Misc thingies


BatChmod - This is a dead simple GUI frontend to chmod. It is pretty convenient with all the permission settings available with a click. I use it to fix "broken" Mac application bundles also.


AppZapper - OK, it might be silly too need an application to uninstall applications you previously installed. Normally one is encouraged to drag the offending application to the trashcan and be done with it. Yes, this rids you of the application but it does not remove anything left behind by said application. AppZapper removes both and makes a cool sound effect when it's done.

Keka - A simple archive decompression program that decompresses archives. And thats all. Keka supports tons of compression formats and has not failed me yet. Cute icon too.

Saturday, January 1, 2022

Recursive directory and file permissions in Linux

Sometimes I need to set permissions on a bunch of files and directories which are inside another directory. This is how I do it. These are two separate commands, one on each line.

find <path to whatever> -type d -exec chmod 0755 {} \;

find <path to whatever> -type f -exec chmod 0644 {} \;